Christmas🎄 | DIY | Holidays
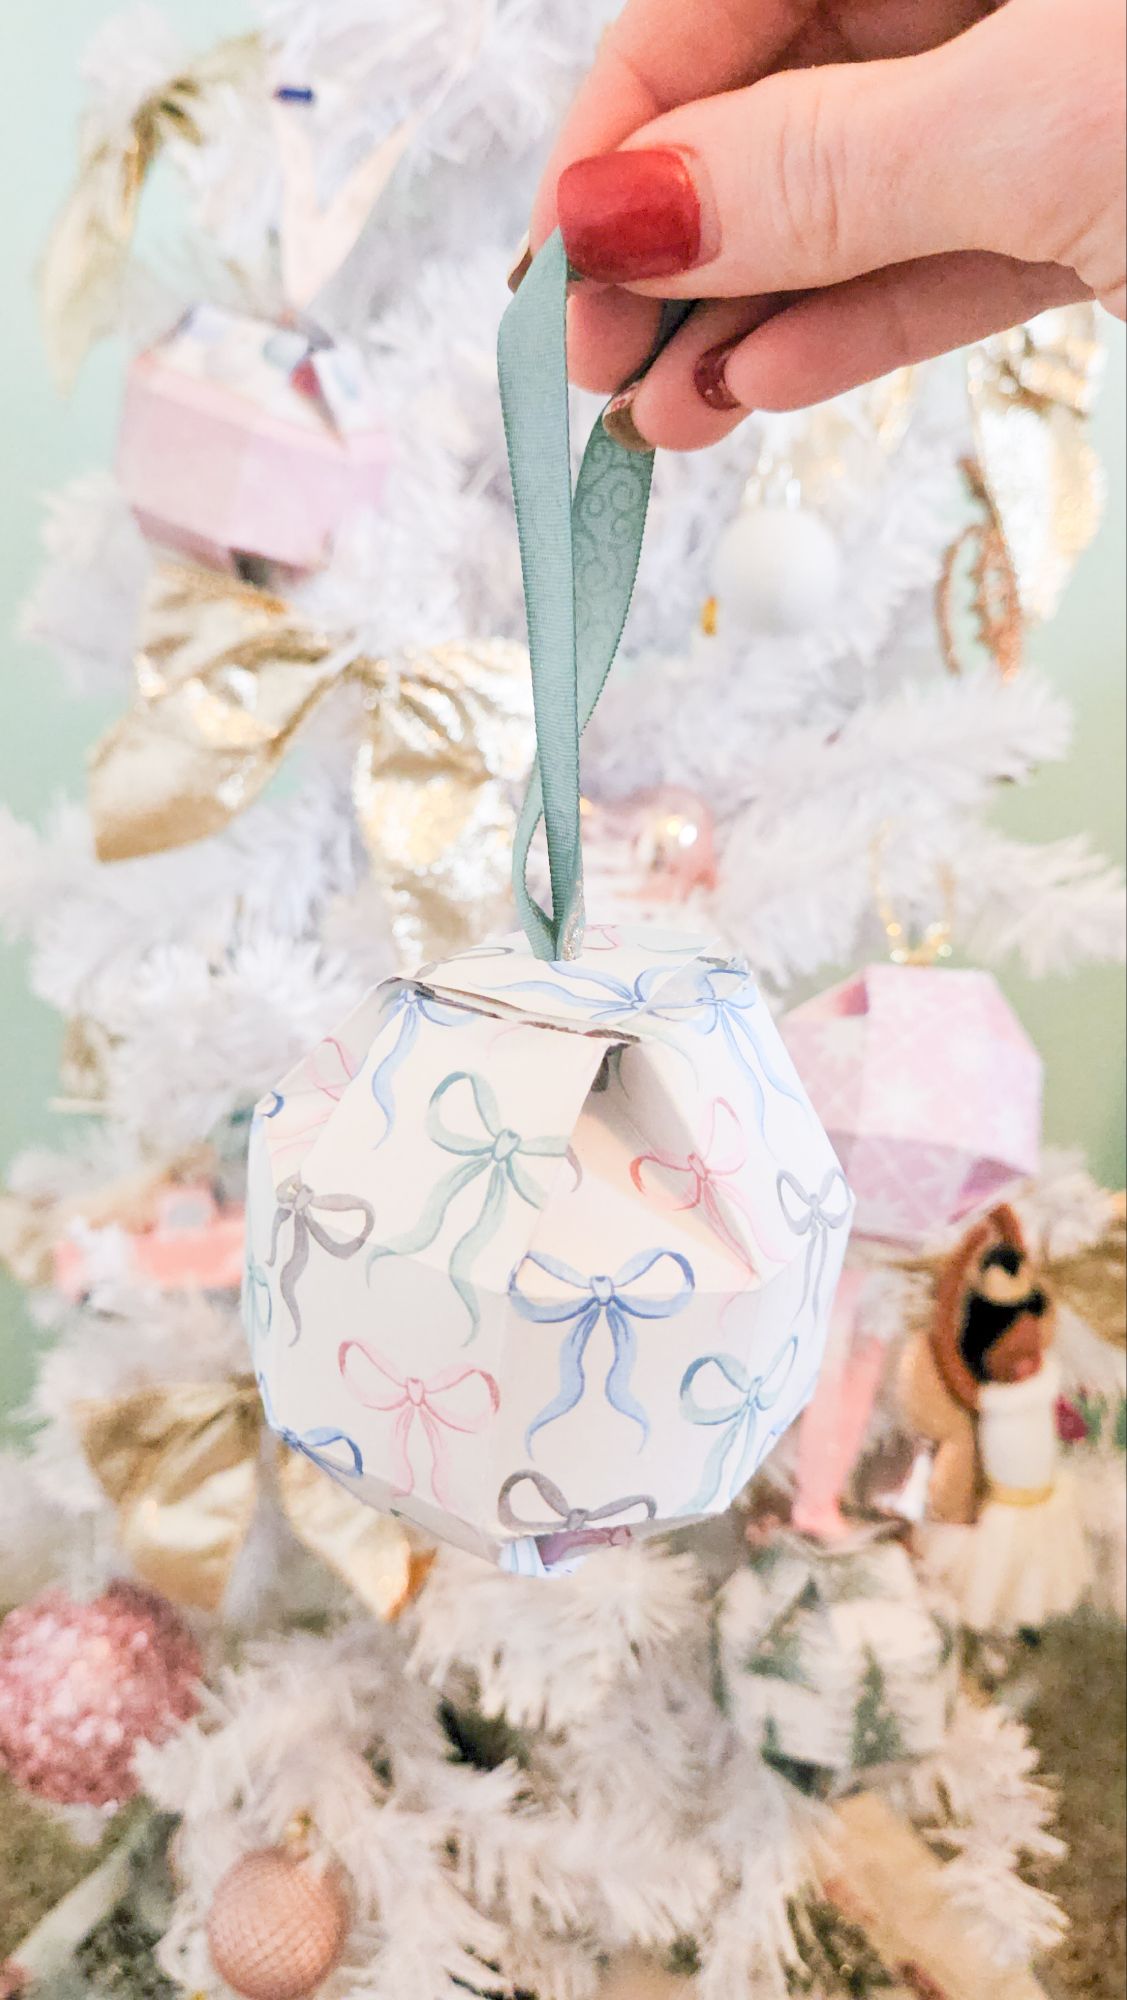
DIY Paper Ornament Holders
Here is the free printable template for you to use!
This is the ribbon I used from Michaels as well
This scoring board is also super helpful!!
and you will need double-sided tape!
Steps:
- Cut your paper to fit your printer.
- Print the template off on the back side of your scrapbook paper.
- Cut the largest rectangle out
- Cut remaining squares and the two side small rectangle
- Do 2 small cuts along the lines without cutting out the middle rectangle on the side
- Do a hole punch where each tiny square is.
- fold on all the lines scoring makes this SO much easier! Making sure the triangles fold IN. Watch my reel to see what I mean. 🙂
- Using double sided tape, connect 2 of the end tabs together from the side without the hole punches! It doesn’t matter which two as long as they are across from one another.
- Fold the next end tabs over using double sided tape once again making sure those triangles are pushed in. If you are unsure, watch my video. There will be three tabs that are on the side that need taped in so you will fold those to complete the shape. All that should be left are the tabs with the hole punches.
- Fill with any goodies you want before closing it shut!
- Cut ribbon to be about 14inches and tie a knot using the two ends. Pull it through the first hole punch but you will want to use double sided tape to connect each tab well and continue this until the ribbon is through each hole and each tab has been taped.
- One final knot at the very end keeps it closed and tight!
Let me know if you have any questions. This was inspired by this video but I decided to make a template (er, thanks to my dad!! he did the leg work on this project!) to make it easier for us all and I decided to use patterned cardstock to make this much simpler but beautiful!
Follow me for more holiday ideas and magic!
xoxo,
Ash